
Spooky Creative Tech Projects
It is almost time for the scariest night of the year: Halloween! To help you create a really spooky vibe, we thought it would be fun to do some easy and cute costumes for your Smartibot that you can totally DIY 👻🛠️ They are all ghosts but each costume uses a different material; paper, felt and 3D printed plastic. Even if you don't have a Smartibot (yet) these all make great, easy to make Halloween directions.
We also written some JavaScript code to give your Smartibot ultra cool colour-changing eyes for some serious Halloween energy.
Behold the ghostly costumes:

Let’s get started!
DIY Moving Paper Craft Ghost
To make the paper ghost costume, you will need:
- the paper ghost template printed on A4 or US Letter white paper at 100% scaling
- a pair of scissors
- double-sided tape

The first thing you will have to do is cut out the template. For the arms, you can either cut them out alongside the solid line like in this picture so your Smartibot can drive around in its ghost costume:

Or like this, where you only cut the semi-circle if you want to use the Smartibot board to illuminate the ghost from below:

Next up, fold the arms out and fold the template inwards alongside the dashed lines.

Get some double-sided tape, stick it onto the two tabs and remove the upper layer.

Then, stick the tabs to the side of the costume and you're done! Just the place the paper costume on your Smartibot and start driving it around!

DIY Fabric Robot Ghost Costume
The felt fabric ghost costume is my favourite, especially because there is no sewing involved!
To make the felt ghost costume, you will need:
- this pattern template
- white felt fabric (a square of 40x40cm is enough)
- a pair of scissors
- double-sided tape
- a pencil
To get started, cut the five patterns from the template and place the felt on a table to straighten it up. Then, use your pencil to trace the patterns on the felt. Trace the triangular shaped pieces twice, because this will form the sides of the ghost costume.
For the ghost template, use your pencil to punch little holes through the paper template to leave a mark on the felt fabric. When you remove the paper, connect the dots and draw the mouth.

Then, cut the five pieces out. You will now have one square, two side pieces, a ghost front piece, and a centre rear piece.
Next up, get the rear centre piece and place a side piece on each side. The slanted part of the side piece should be positioned against the centre rear piece like in the picture below:

Get your tape out and cut a couple of strips off. The tape we used in this tutorial is 1 cm wide, which is a bit too wide, so we will cut it in half. If you cut smaller strips this will make it easier for you (otherwise you will end up with a lot of tape sticking on your scissors!).
Stick the tape on both sides of the centre piece, and place the slanted part of the side piece on top of the rear centre piece. Repeat the same step for the other side.

Next, stick some tape on the upper sides of the three felt pieces you have joined together. Starting from the left, place the upper edges of the small square on top of the left side piece and press firmly to make sure the tape is sticking well. Then work your way around by placing the right side of the small square on top of the centre piece and press firmly. Lastly, press the right side piece and the square together.

For the final steps, flip the felt structure over and stick tape on the three sides. Press each sticky side against the side parts of the ghosts, like in the image below:

That's it! Place the felt ghost costume on your Smartibot, stick some fun googly eyes on and you are ready to scare everyone off!

3D Printed Halloween Ghost

We printed this ghost costume using transparent PLA because we want the colour-changing eyes to show clearly. It prints without support and fits over a Smartibot circuit board so that the ghost is illuminated by the eye LEDs. It has holes to and bosses screw the it onto the board with M3 bolts if you like. You can download the file over on Thingiverse.
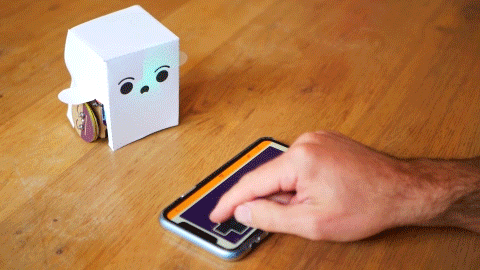
Programming your Robot with JavaScript
Open up the Espruino environment and load this code onto your Smartibot:
//This code is adapted from fade.js by Niels Doorn https://gist.github.com/nielsdoorn/8631319

var smarti = require("Smartibot");

//turn off eyes on startup
smarti.setLEDs([0,0,0], [0,0,0]);


//a function to turn the eyes off
function off() {
smarti.setLEDs([0,0,0], [0,0,0]);
}


//variables for the direction of fade, position in the fade and red, green and blue values for the eye colour
var dir = -1;
var pos = 0;
var r,g,b;

E.on('init', function() {

function flow() {
  //Switches from fading up to fading down at full brigtness and vice versa at minimum brightness
  if (pos > 255 || pos < 1) {
    dir *= -1;
  }
  //generates a random colour each time the eyes fade in and out
  if (pos < 1) {
    r = Math.floor(Math.random() * 255);
    g = Math.floor(Math.random() * 255);
    b = Math.floor(Math.random() * 255);
    console.log(r,g,b,dir,pos);
  }
  //increments the fade each time the flow() function runs
  pos += (dir*15);
  //sends the red, green and blue values to the eyes
  doLights();
}

//function to send the red, green and blue values to the eyes
function doLights() {
  smarti.setLEDs([Math.sin(pos/255)*r,Math.sin(pos/255)*g,Math.sin(pos/255)*b], [Math.sin(pos/255)*r,Math.sin(pos/255)*g,Math.sin(pos/255)*b]);
}

off();
//makes the flow() function run every 90 miliseconds
setInterval(flow, 90);

});
This section of the video shows you how to do this in more detail:
Get Creative for Halloween!
We had a lot of fun making these creations with paper, felt fabric and 3D printing filament and we hope you have a lot of fun making them too!
We are always curious to see your creations, so make sure you let us know about how it went by sharing pictures on Facebook, Instagram or Twitter.
We hope you have a super-fun halloween!
